GDES3013 GREEN DESIGN
Screen Printing 3D Artefact
Today I screen printed the design onto my pizza packaging. I had only screen printed once prior to this and that was a while ago and so I was a little concerned that I may have been too ambitious with my design. As it turns out, the process is actually quite intuitive and very enjoyable, so I will definitely be experimenting more in the future.
- The artwork needs to be prepared in layers, one for each colour which will then have it’s own screen. The artwork has to then all be black and at 300dpi for the highest quality line work.
- Each layer is then printed onto high quality acetate film that the technicians have on campus. I’m told it’s a special construction that is actually made up of millions of minuscule tubes that hold the ink perfectly.
- The screens are prepared using emulsion, which needs time to dry before exposure.
- The acetate is then exposed to a silk screen using a special machine that vacuum’s all of the air out to ensure there is no light leak.
- After 120 seconds the screen is exposed. Then you have to wash the solution of the screen in the water spray booth. By holding it up to the light you can check that artwork looks correct,and has no marks or solution left on it. Then the screens are dried off and are ready for use.
- Any exposed areas, such as the edges of the screen or areas that you don’t want to print are covered with waterproof tape.
- The ink/paint is a mix of acrylic paint, screen printing solution and water until the consistency is just runny enough to go through the screen.
- Ink is placed on the screen, along the top of the artwork before being “loaded”. This is when you pass the ink over the artwork to start the flow.
- Whatever you are printing onto, in my case my packaging, then needs to be aligned. This is done using tape and markers. The screen printing table has suction, so when you are aligned and start to lower the screen, the bed sucks the paper/card onto it.
- Once the screen is loaded with ink and lowered down onto the bed, you can start printing. This is done by angling the squeegee to 45 degrees and pressing down firmly until the screen touches the material, then pulling towards you in a fairly swift motion. As you raise the screen you re-load it by running the squeegee back to the top.
- At this stage you check the print to admire your handy work. I printed several copies so that I could choose the best one’s to hand in at the end.
- This process is then repeated for each colour until complete, making sure to clean the screens after each pass so that the ink doesn’t dry on the screen.
- The prints are then left to dry on the rack & voila…. done!

Artwork printed in solid black onto high quality acetate

Vacuum!

Vacuum machine, for exposing the screens

Washing the solution off after exposure

Screen once solution had been washed off


The screen print table

Securing the screen for the first layer

Screen is “loaded” with white ink for the first time

First test print onto brown paper

Aligning the artwork

First print

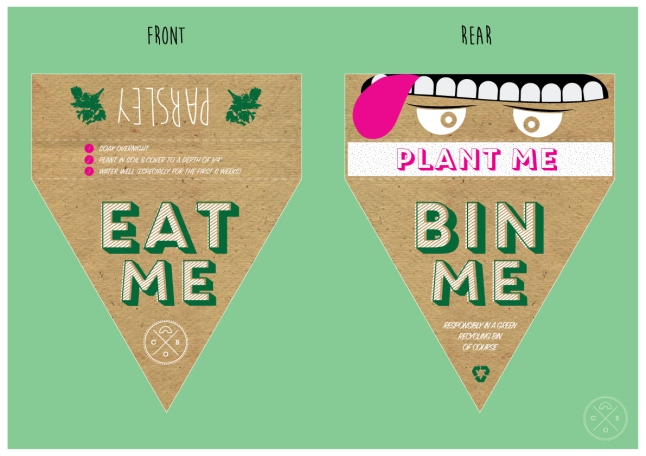
Both sides of the printed artwork

Artwork arranged to show how it would come flat packed. Each plate would then be torn off and used

Final printed packaging

Mixing the ink

first layer on the rack